Building a successful vermicomposting bin transforms everyday kitchen scraps into a rich, nutrients-packed soil amendment. By harnessing the incredible work of red wiggler worms, gardeners and sustainability enthusiasts can reduce waste and enrich their gardens. This guide outlines all the steps needed to create and manage a thriving vermicomposting system.
Understanding Vermicomposting
Vermicomposting is the process of decomposing organic matter using specific worm species, most commonly Eisenia fetida, also known as red wigglers. Unlike traditional compost piles, vermicomposting bins operate on a smaller scale, making them ideal for indoor or urban environments. The worms consume kitchen scraps, shredded paper, and other biodegradable materials, producing castings that are exceptionally rich in plant-available nutrients.
Why Choose Vermicomposting?
- Space Efficiency: Can be done in small apartments or patios.
- Speed: Worms break down material faster than conventional compost heaps.
- Low Odor: A well-managed bin remains virtually odorless.
- High-Quality Output: Castings are teeming with beneficial microorganisms.
Key Biological Principles
Successful vermicomposting depends on a balanced environment. Maintain a consistent temperature (ideally 55–77°F), proper moisture levels (similar to a damp sponge), and adequate aeration. Worms require both oxygen and humidity to thrive, so your bin must facilitate air circulation while retaining moisture.
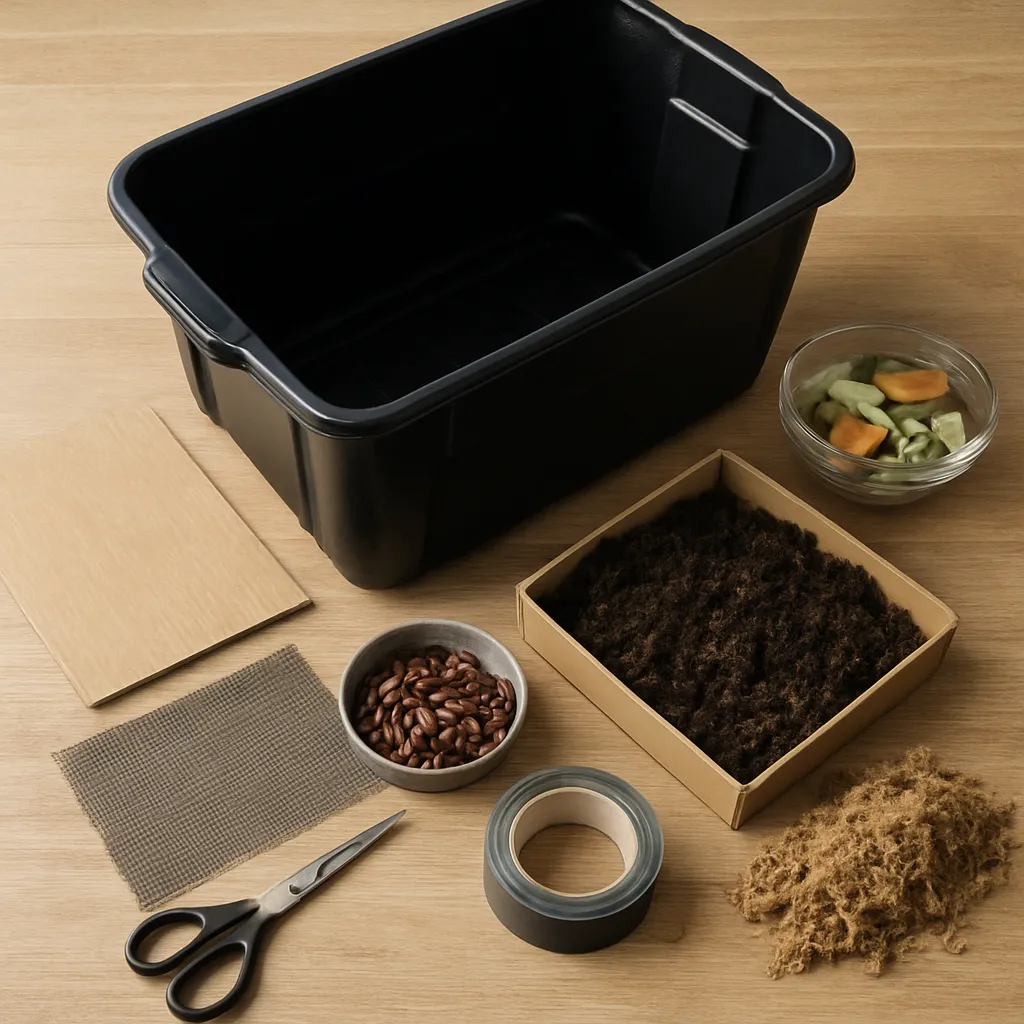
Materials and Tools Needed
Gathering the right components ensures your bin is comfortable for the worms and efficient in processing waste. Below is a list of essential items:
- Plastic or wooden bin with a tight-fitting lid (dimensions around 18×15×10 inches)
- Drill or hand tool for creating drainage and ventilation holes
- Shredded cardboard, newspaper, or coconut coir for bedding
- Red wiggler worms (500–1000 worms per square foot of bin surface)
- Spray bottle filled with water to adjust moisture
- Kitchen waste collector (for storing scraps before adding to bin)
- Thermometer (optional, but helpful for monitoring temperature)
- Tray or pan to catch leachate beneath the bin
Selecting Bedding Materials
Bedding provides both shelter and initial carbon-rich content for worms. A ratio of approximately 3 parts bedding to 1 part kitchen scraps by volume is recommended. Shredded cardboard and newsprint are excellent choices; avoid glossy or colored inks. Coconut coir also works well, as it retains moisture and maintains structure over time.
Step-by-Step Construction
Constructing your vermicomposting bin is straightforward. Follow these steps precisely to provide an ideal habitat for your worms:
1. Prepare the Bin Base
- Drill several ¼-inch holes on the bottom surface for drainage.
- Create additional holes on the sides near the top to allow air exchange.
- Place a tray underneath to collect excess liquid, known as “worm tea.”
2. Add Bedding Layer
Introduce a 4–6 inch layer of damp bedding material. Fluff it to create pockets of air, ensuring the worms can navigate easily. The bedding should feel like a well-wrung sponge—moist but not dripping wet.
3. Introduce Worms
Gently place the red wigglers onto the bedding’s surface. They will naturally migrate downwards to escape light and establish themselves in the bedding. Allow at least 24 hours before adding food to minimize stress.
4. Begin Feeding
After a day, start adding small amounts of kitchen scraps. Aim for a mix of nitrogen-rich items (fruit and vegetable peels) and avoid high-acid foods like citrus or onion skins in large quantities. Bury the scraps under the bedding to discourage pests and odors.
Maintaining Your Bin
Proper maintenance is critical for a healthy vermicomposting system. Regular checks and minor adjustments keep the worms active and the bin odor-free.
Moisture Control
Inspect moisture weekly. If the bedding feels dry, lightly mist with water. If too wet, add dry bedding or reduce feeding frequency. Proper moisture prevents anaerobic conditions and foul smells.
Temperature Regulation
Vermicomposting bins perform best between 55–77°F. In colder climates, insulate the bin with blankets or move it to a warmer spot. In hot weather, provide shade or relocate to a cooler area to prevent overheating.
Feeding Routine
- Feed once or twice a week, adjusting amounts based on worm activity.
- Rotate feeding zones to allow worms time to process material thoroughly.
- Chop scraps into small pieces to accelerate decomposition.
Common Issues and Solutions
- Fruit Flies: Bury scraps deeper, cover the surface with damp newspaper.
- Odor: Check moisture, add more bedding, ensure proper aeration.
- Escapees: Bin might be too wet or lacking oxygen; adjust accordingly.
Harvesting and Utilizing Vermicompost
After 3–6 months, your bin will yield dark, crumbly castings rich in microorganisms and plant-available minerals. Harvesting can be done through several methods:
Light Method Separation
Push finished compost to one side, add fresh bedding and food to the empty side. Worms will migrate over, allowing you to collect the mature castings.
Screening Technique
Use a fine-mesh screen to sift out large particles and worms, returning the latter to the bin.
Leachate Collection
The liquid that drains from the bin, sometimes called “worm tea,” can be diluted (10:1 water to leachate ratio) and applied as a foliar spray or soil drench, providing a quick nutrient boost.
Apply vermicompost around plants, seed rows, or mix into potting soil. Its benefits include enhanced soil structure, improved water retention, and increased resistance to disease. By integrating vermicompost into your gardening practices, you create a sustainable loop that reduces waste and promotes vibrant plant growth.