Creating a DIY drip line system can transform any garden into a highly productive landscape, providing plants with a consistent supply of water while minimizing waste. This guide walks you through each step, from initial planning to maintenance, ensuring your irrigation setup delivers maximum efficiency and longevity.
Planning Your Drip Line Layout
Understanding Soil and Plant Needs
Before installing any tubing or connectors, assess the type of soil and the water requirements of your plants. Sandy soils drain quickly, requiring more frequent watering sessions, while clay-heavy soils retain moisture longer but risk waterlogging. Categorize your garden beds by grouping plants with similar hydration needs. This approach supports water conservation and reduces the risk of under- or over-watering.
Mapping Your Garden
Sketch a detailed map of your garden, marking individual beds, trees, and container clusters. Plan mainlines and feeder lines so that water delivery points are no more than 12–18 inches from each plant. By mapping out distances, you can determine the length of tubing, number of emitters, and type of connectors required. This upfront work streamlines the installation process and enhances system efficiency.
Gathering Materials and Tools
Essential Components
- Mainline tubing (usually ½-inch or ¾-inch diameter)
- Drip tubing for laterals (typically ¼-inch diameter)
- Emitters or drip lines with built-in emitters
- Pressure regulator (to maintain consistent flow)
- Filtration unit (to keep particles out of lines)
- End caps and stakes
- Hose adapter and backflow preventer
Optional Accessories
- Automatic timer or smart irrigation controller
- Different flow-rate emitters (e.g., 0.5, 1, 2 GPH)
- Micro-sprayers for larger planting areas
- T-connectors, elbows, and cross-fittings for complex layouts
- UV-resistant tubing for prolonged outdoor exposure
Installation Process
Setting Up the Water Source
Begin by attaching the backflow preventer to your outdoor spigot to safeguard potable water. Next, connect the pressure regulator to the preventer. Drip systems operate best between 15 and 30 PSI; a pressure regulation device ensures emitters function within their optimal range. Finally, attach the mainline tubing to the regulator using a hose adapter, ensuring a snug seal to prevent leaks.
Laying the Mainline and Laterals
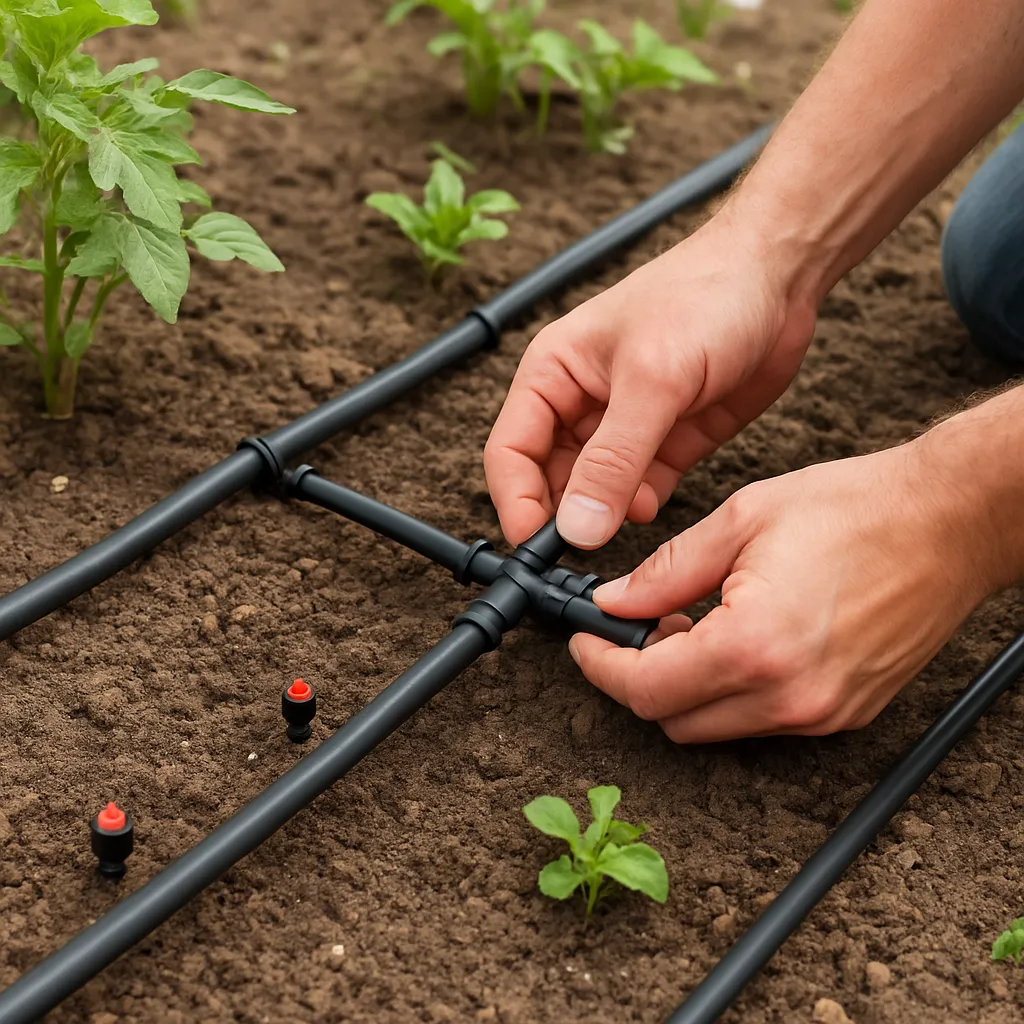
Unroll the mainline tubing along your pre-planned route, securing it with stakes every 2–3 feet. Avoid sharp bends that could restrict water flow. Where you need to branch off, use a barbed T-connector: insert the tubing into each barb firmly, and secure with small clamps if necessary. Run ¼-inch laterals from these tees towards individual plants or clusters. Keep lines laid out flat, and press them gently into the soil surface for stability.
Installing Emitters and Connectors
For inline tubing with built-in emitters, no additional drilling is required—simply cut the tube to the desired length and cap the end. With plain tubing, punch tiny holes at each plant location using a hole punch tool. Insert a barbed emitter, pushing firmly until it locks in place. Space emitters according to root spread; most veggies do well with 1 GPH emitters every 12 inches. Avoid overcrowding to maintain proper flow and prevent moisture competition.
Quick Tip: Flushing Lines
Before finalizing all end caps, briefly turn on the water to flush debris from the lines. This simple step can prevent blockages and eliminate fine particles that may clog emitters down the road.
Optimizing System Performance
Pressure Regulation and Filtration
Dirty water or fluctuating pressure can undermine your system’s performance. Install a sediment filter rated at 120 mesh or higher right after the backflow preventer. Clean or replace filter cartridges as recommended by the manufacturer. Check the pressure gauge periodically; adjust the regulator if you notice uneven watering patterns or emitter drips that are too weak or too strong.
Testing and Adjusting Flow
Walk the entire layout and observe each emitter’s output. Look for puddles, dry spots, or irregular flow. Replace any damaged lines, tighten loose fittings, or swap emitters with different flow rates to balance the system. By tweaking emitter placement and flow, you guarantee uniform hydration across all planting zones.
Maintenance and Troubleshooting
Regular Checks
- Inspect tubing for cracks, pinholes, or UV damage each season.
- Clean filters monthly during peak watering periods.
- Ensure stakes remain firmly in the ground to avoid line sagging.
- Look for signs of rodents or pests chewing on the tubing.
Common Issues and Solutions
Leaking connectors: Replace worn barbs or tighten clamps. Decreased flow: Clean or replace clogged filtration elements and flush the lines. Dry patches: Check for broken emitters or shifted tubing and realign as needed. Overly wet soil: Reduce emitter output or adjust the timer schedule. These simple fixes keep your DIY drip line system running at peak performance.
Enhancing Longevity and Adaptability
Consider seasonal adjustments by adding or removing lines as your garden changes. For raised beds with annual crops, the system can be reconfigured quickly with extra connectors and tubing. Investing in UV-resistant materials and weatherproof timers enhances the durability of your setup. A modular design supports future expansions and flexibility in watering new garden zones.
Encouraging Healthy Root Development
Drip irrigation fosters deep, consistent hydration that encourages plant roots to grow downward rather than spreading across the surface. This leads to sturdier plants capable of accessing nutrients stored deeper in the soil. By delivering water directly to the root zone, you minimize evaporation and runoff, promoting robust growth and high yields.
Customizing Your System for Specific Crops
Tomatoes, peppers, and other vegetables thrive on 1–2 GPH emitters spaced 12–18 inches apart. Strawberries do well with low-flow drippers every 8 inches, while rows of leafy greens benefit from inline drip tubing that emits along its entire length. Adapt emitter type and spacing to match each plant’s root architecture, ensuring precise moisture delivery without excess.
Expanding to Larger Landscapes
For orchard or vineyard applications, upsizing the mainline to 1-inch tubing reduces friction loss over long distances. Install additional pressure regulators and filtration stations at intervals to maintain steady flow. Use point-source emitters near tree trunks, and micro-sprayers in under-canopy groundcover areas. This scalable approach allows you to deploy a similar DIY methodology on acre-scale plots.
Investing in Smart Controls
Upgrade to a programmable timer or Wi-Fi-enabled controller to automate watering schedules. By setting specific intervals and durations, you can adapt to weather patterns and seasonal shifts without manual intervention. Smart sensors for soil moisture can further optimize the system, triggering irrigation only when the soil drops below a set threshold, maximizing water conservation.