Building a cost-effective drip irrigation system can transform the way you water your garden or farm, maximizing yield while conserving precious resources. By integrating simple techniques and affordable components, you can create a highly efficient network that delivers water directly to plant roots, reducing evaporation and runoff. This guide walks you through every step, from initial planning to ongoing maintenance, ensuring your drip irrigation setup remains sustainable and budget-friendly.
Planning Your Drip Irrigation Layout
Before purchasing any materials, it’s crucial to design a layout that matches your garden’s topography, plant density, and water source. Accurate planning prevents waste, minimizes labor costs, and guarantees uniform distribution.
Mapping Your Garden Area
- Sketch your planting zones, indicating rows, raised beds, or container clusters.
- Mark the elevation changes: even slight slopes affect water pressure.
- Note proximity to your water supply. Is it a hose bib, rain barrel, or well pump?
With a clear map in hand, estimate total tubing length and the number of drip lines or emitters needed. Overestimating slightly is safer than running short mid-installation.
Calculating Water Pressure and Flow
Measure the available water pressure using an affordable pressure gauge at your spigot. Aim for a range between 20 and 30 psi for most drip systems. Equally important is flow rate (gallons per minute), which determines how many emitters you can run simultaneously. A low-cost gauge and stopwatch can help:
- Attach gauge, open faucet fully, record pressure.
- Fill a one-gallon container while timing how long it takes; calculate flow rate (1 gallon ÷ seconds × 60).
Knowing these values assists in selecting pressure regulators and planning zone divisions to avoid under- or over-watering.
Choosing Affordable Materials and Components
Selecting the right parts is a balance between cost and quality. Opt for durable yet inexpensive options wherever possible to stretch your budget without compromising performance.
Main Supply Lines and Lateral Tubing
- Black poly tubing (½” or ¾”) serves as the backbone; available in bulk rolls at low prices.
- Drip tape or thin-walled tubing can be used along rows of uniform crops.
Purchase in bulk for volume discounts. Verify compatibility between your main line diameter and connectors to avoid leaks.
Emitters, Drippers, and Sprayers
- Pressure-compensating emitters maintain uniform flow despite elevation changes.
- Inline dripper tubing includes built-in emitters at fixed intervals.
- Micro-sprayers work well for wider coverage on young plants.
If you have mixed plant types, combine inline tubing for row crops with individual drip stakes for vegetables or ornamentals. Prioritize customization to address distinct plant water needs.
Valves, Filters, and Regulators
- A coarse filter at the system’s inlet prevents debris from clogging small drip openings.
- Pressure regulators ensure the system operates within the safe pressure range.
- Zone valves allow you to run separate areas independently.
Investing in a quality filter and regulator saves time and replacement costs later. Consider DIY screen filters from hardware stores as a cost-effective alternative to specialized models.
Installation Steps for a Budget-Friendly System
With your plan and parts ready, follow systematic steps to ensure a leak-free, efficient installation. Efficient execution reduces potential delays and extra expenses.
Step 1: Lay Out Main and Secondary Lines
- Unroll and position the main line along your mapped route.
- Use stakes or ground pegs to secure tubing at regular intervals.
- Keep the main line slightly elevated off the soil to spot leaks easily.
Adjust bends gently; sharp folds can kink tubing and impede flow.
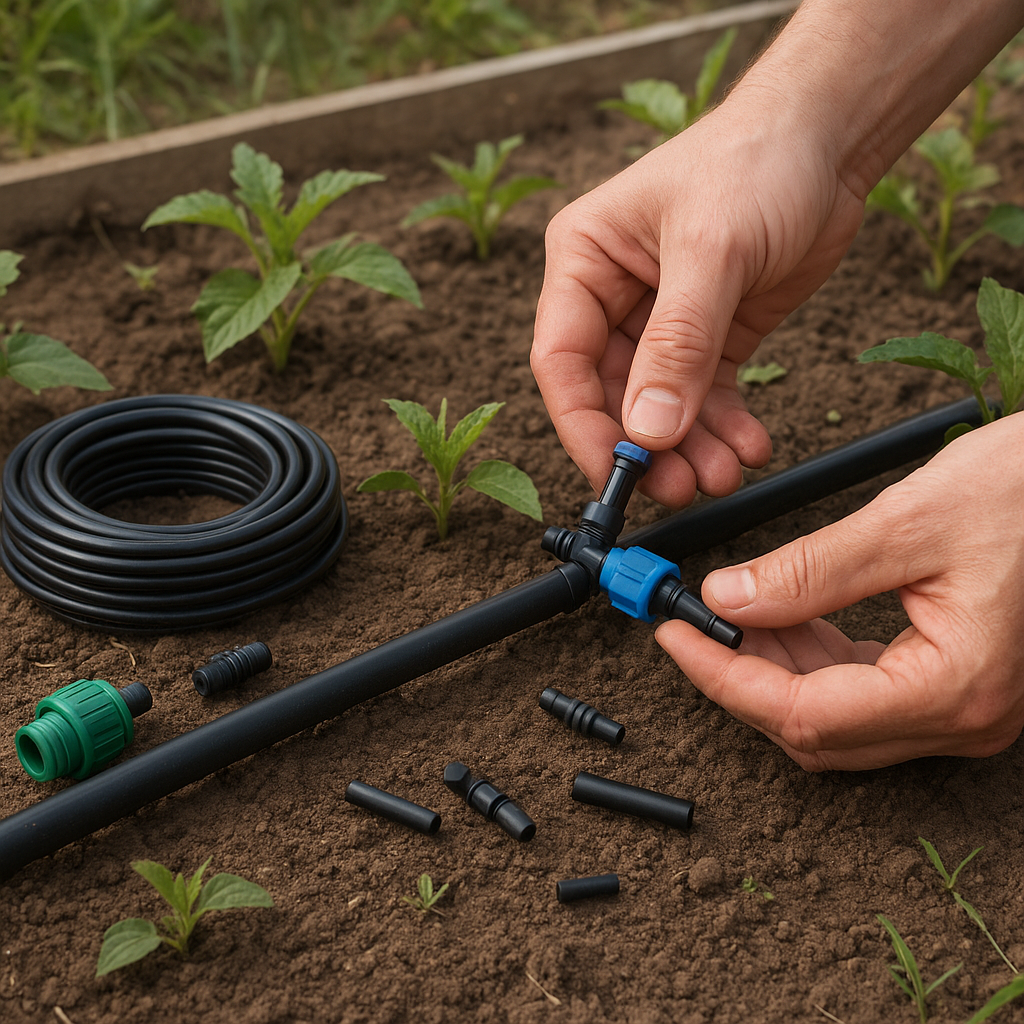
Step 2: Cut and Connect Tubing
- Measure and cut lateral lines with sharp utility scissors.
- Insert barbed connectors into tubing ends; use a heat gun or warm water to soften thick tubing for easier connections.
- Seal all joints with self-fusing tape or hose clamps where needed.
Securing connections properly prevents air from entering the system and causing uneven water delivery.
Step 3: Install Emitters and Drip Tape
- Punch holes in the main line at planned intervals using a hole punch tool.
- Attach micro-tubing from the main line to individual emitters near plant roots.
- Lay drip tape flat along crop rows, securing with staples to prevent shifting.
Ensure each emitter or tape section sits snugly against the soil surface for optimal water penetration.
Step 4: Attach Filters, Regulators, and Timers
- Connect the filter directly to the water source, followed by the pressure regulator.
- Install a timer or manual valve to automate watering schedules.
- Use adapters to match different thread sizes without specialized fittings.
Automation not only saves labor but also promotes consistent watering intervals, vital for healthy plant growth.
Maintenance Tips to Ensure Longevity
Regular upkeep keeps your system running smoothly, prevents costly replacements, and maintains irrigation efficiency over time.
Flushing and Cleaning
- Periodically open end caps to flush out sediment.
- Soak clogged emitters in a vinegar solution to dissolve mineral buildup.
Routine cleaning extends component life and ensures uniform flow across all zones.
Seasonal Adjustments
- Before winter, drain all lines to prevent freezing damage.
- In dry seasons, increase watering duration while monitoring soil moisture.
Adapting settings to seasonal variations improves water efficiency and protects your system from extreme weather.
Expansion and Upgrades
As your garden evolves, you may need additional zones or higher-capacity tubing. Keep spare parts like extra connectors, stakes, and emitters on hand. Incremental upgrades—like adding a second filter or more precise pressure regulators—enhance performance without a significant initial outlay.
- Use modular components to simplify future changes.
- Label each zone for quick identification during repairs.
Being prepared for growth ensures your adaptability and helps avoid emergency expenses.
By applying these practical strategies, you can create a high-performance drip irrigation system that thrives under budget constraints. Engage with your garden’s unique needs, remain attentive to maintenance, and embrace continual improvement for sustainable, cost-effective watering year-round.